Kintsugi is a traditional Japanese technique that uses gold to repair broken pottery. Recently, the popularity of Kintsugi has surged globally, not only increasing the value of repaired items but also sparking interest among those who wish to enjoy DIY Kintsugi.
This article introduces methods of modern Kintsugi, which allow for simpler repairs using contemporary materials.
What Is Modern Kintsugi?
 Modern Kintsugi simplifies the traditional Kintsugi process by using modern materials such as adhesives and synthetic resins, making the repair process easier. Traditional Kintsugi involves using natural lacquer, which can be challenging to handle and often requires weeks to repair a single piece. Additionally, natural lacquer can cause allergic reactions for some people.
Modern Kintsugi addresses these challenges by shortening the process and avoiding the difficulties associated with lacquer. However, unlike traditional Kintsugi, which uses all-natural materials and is completely food-safe, modern Kintsugi may use artificial adhesives that are not food-safe. Therefore, it is better suited for decorative items or vases rather than tableware.
There are various methods of modern Kintsugi, but this article focuses on the most common ones taught in modern Kintsugi workshops in Japan. Although there are methods that appear even simpler and require fewer steps, they may not result in as beautiful a finish.
The goal of modern Kintsugi is to make repairs easier while ensuring a beautiful finish, compared to the highly challenging traditional methods. With modern Kintsugi, even beginners can achieve satisfying results with understanding and concentration. However, it is not something that anyone can easily do without any practice; practice is necessary.
The repair process introduced here takes about 1 to 2 hours of actual work time. Although Kintsugi comes with its fair share of intricate tasks, these tasks can also provide moments of tranquility.Please enjoy your time with modern Kintsugi!
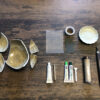
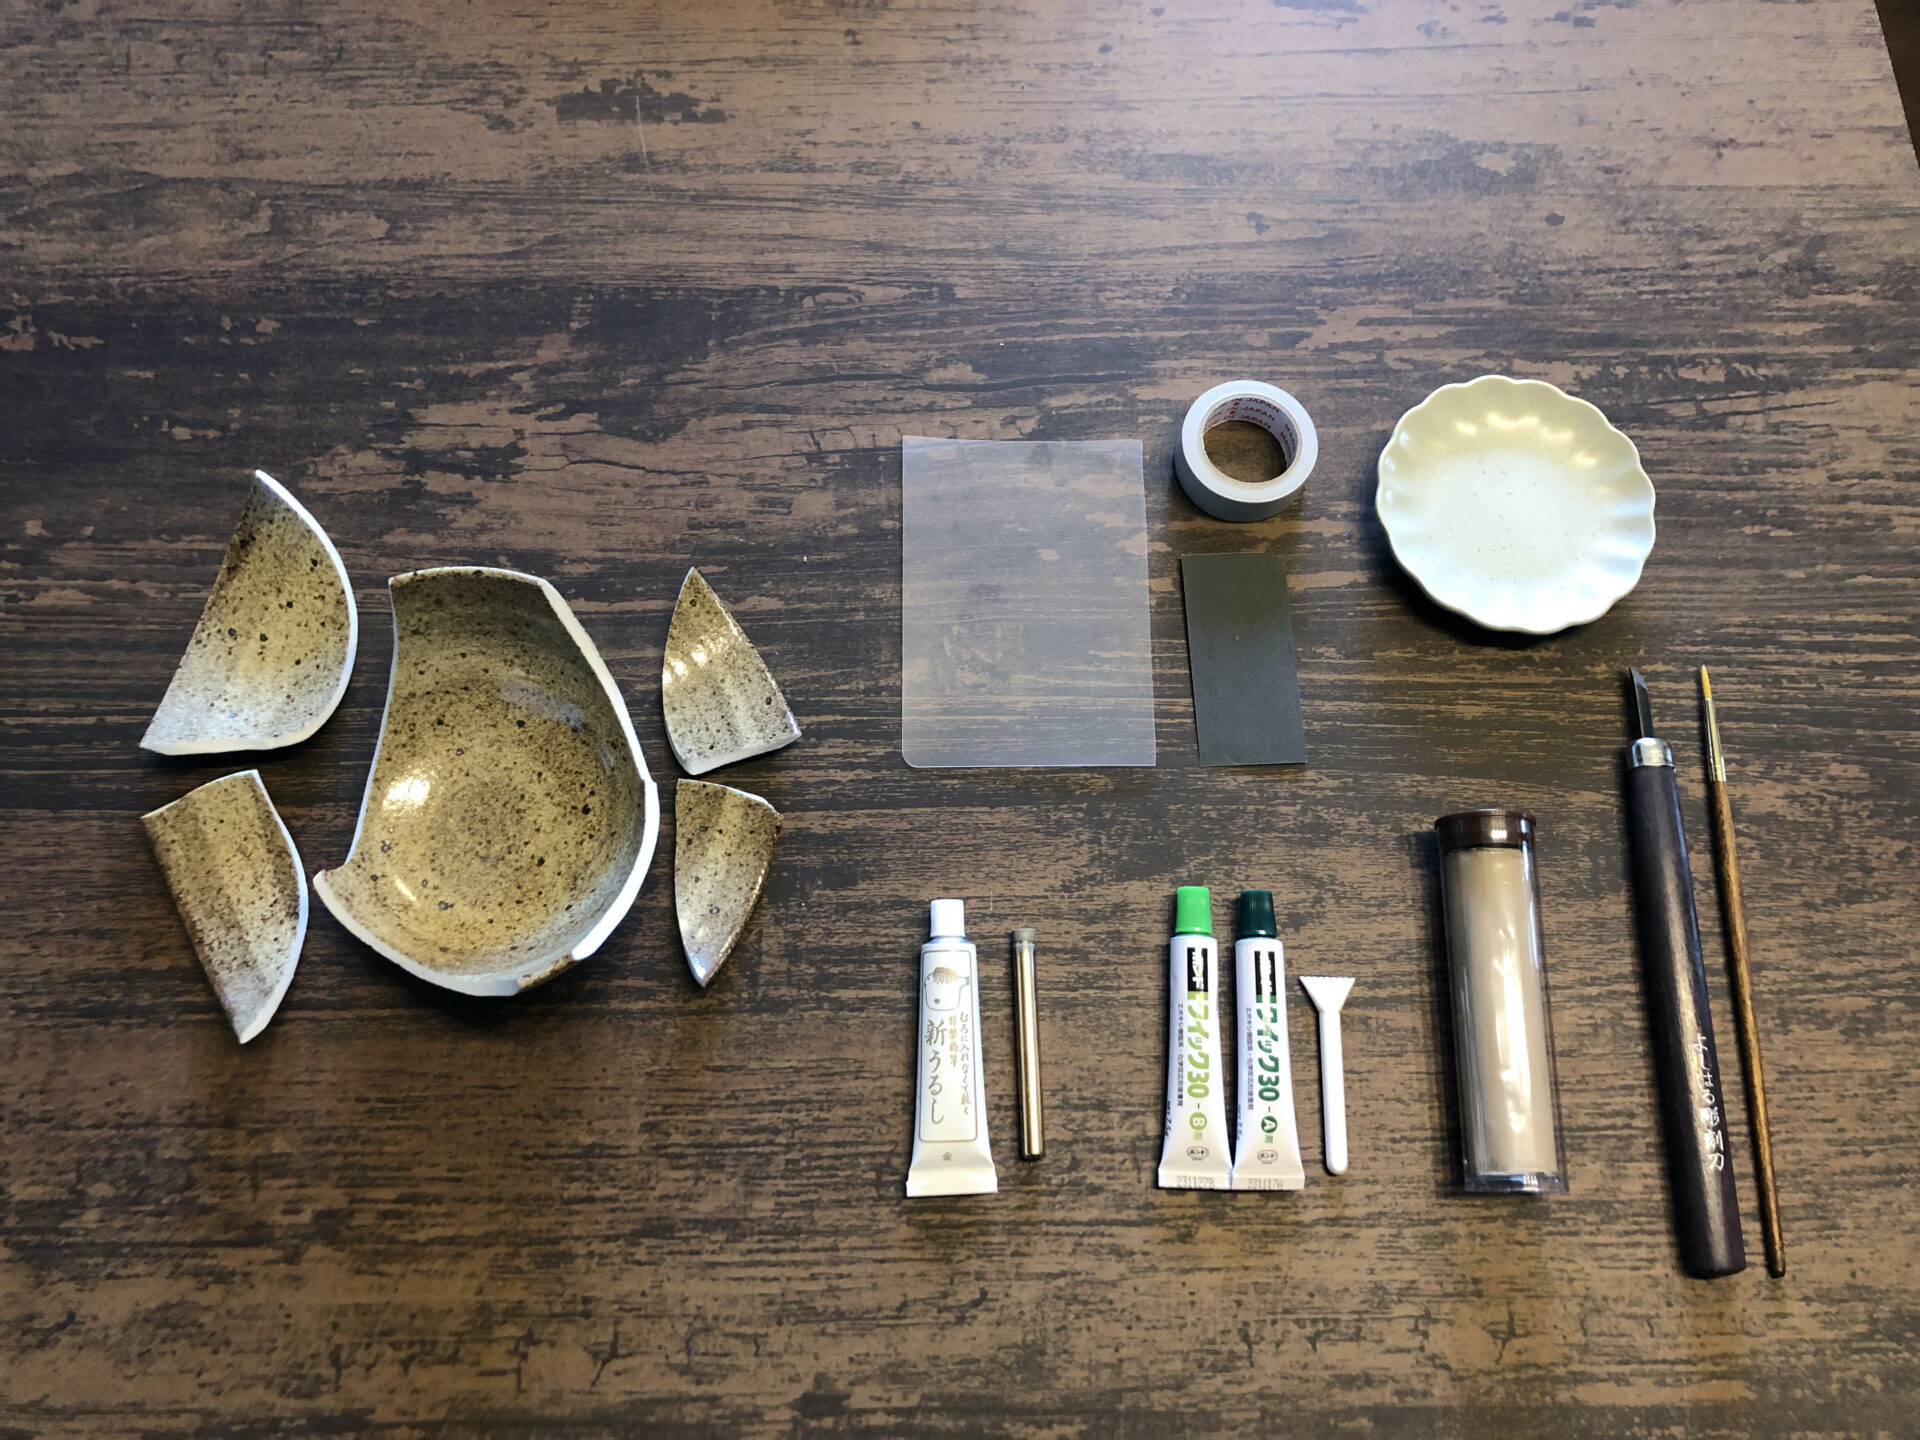
Materials and Tools for Modern Kintsugi
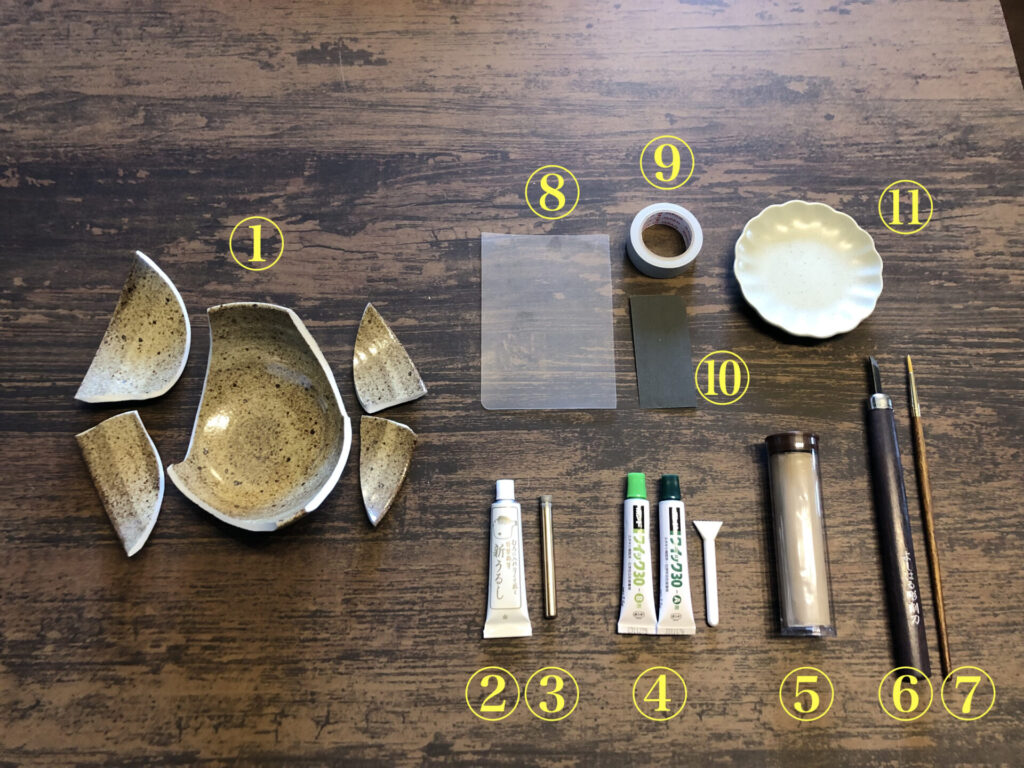
In this section, we introduce the materials and tools needed for modern Kintsugi. It’s worth noting that if some materials are unavailable, substitutes can often be used.
-①Broken Pieces to Repair:
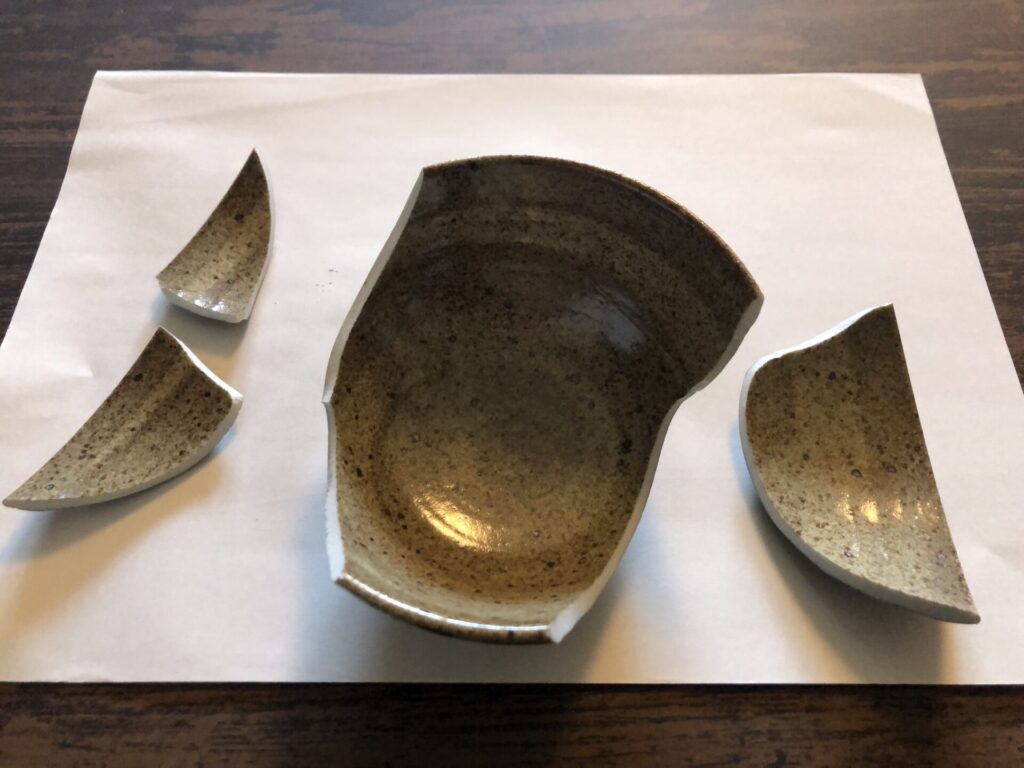
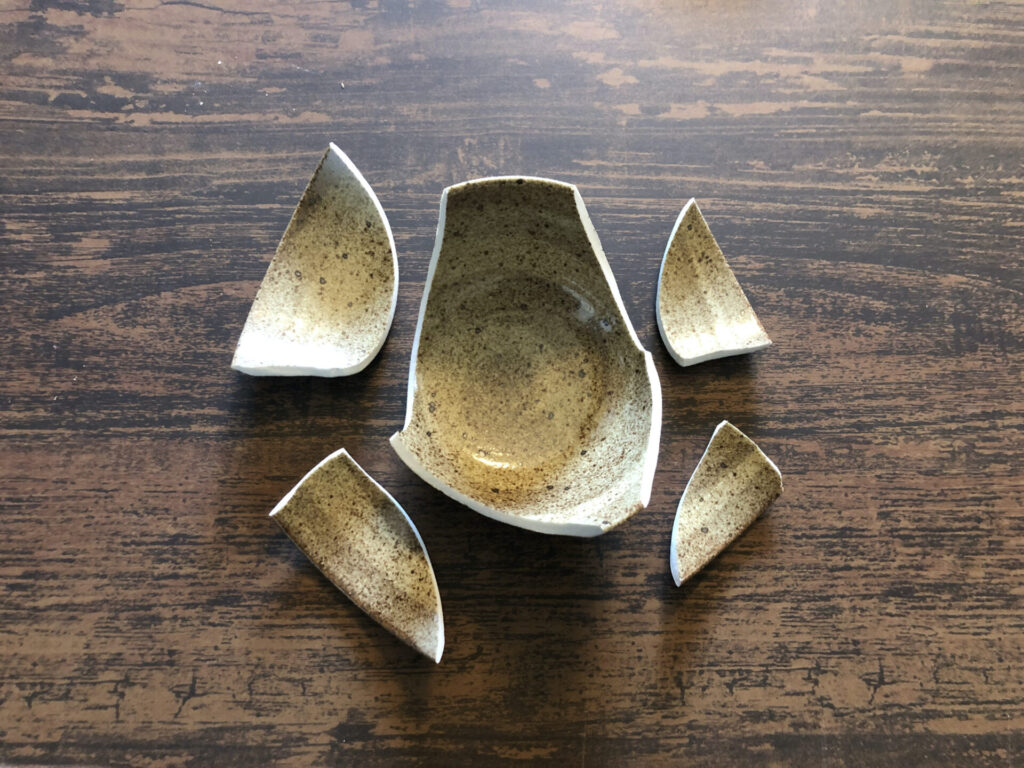 Prepare the piece you wish to mend with modern Kintsugi. Items with 2 to 5 broken fragments are ideal for repair. If there are more tiny chips, the repair becomes more complicated, which might be challenging for beginners.
Don’t worry if some fragments are missing; they can be repaired using a putty.
-②Synthetic Resin:
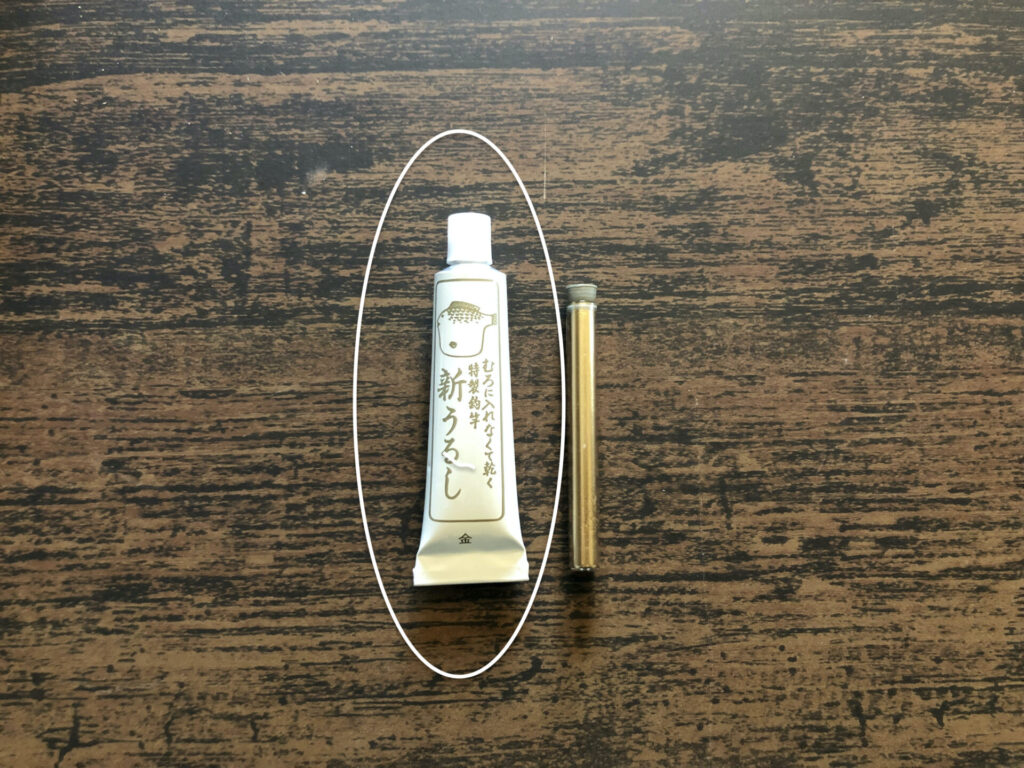 You’ll need synthetic resin to adhere the metal powder. The product shown on the left in the picture is “synthetic urushi,” available in Japan, which resembles the components of natural lacquer.
However, if synthetic urushi is hard to find in your area, other types of synthetic resin, such as epoxy resin, can be used as substitutes.
-③Gold Powder Substitute:
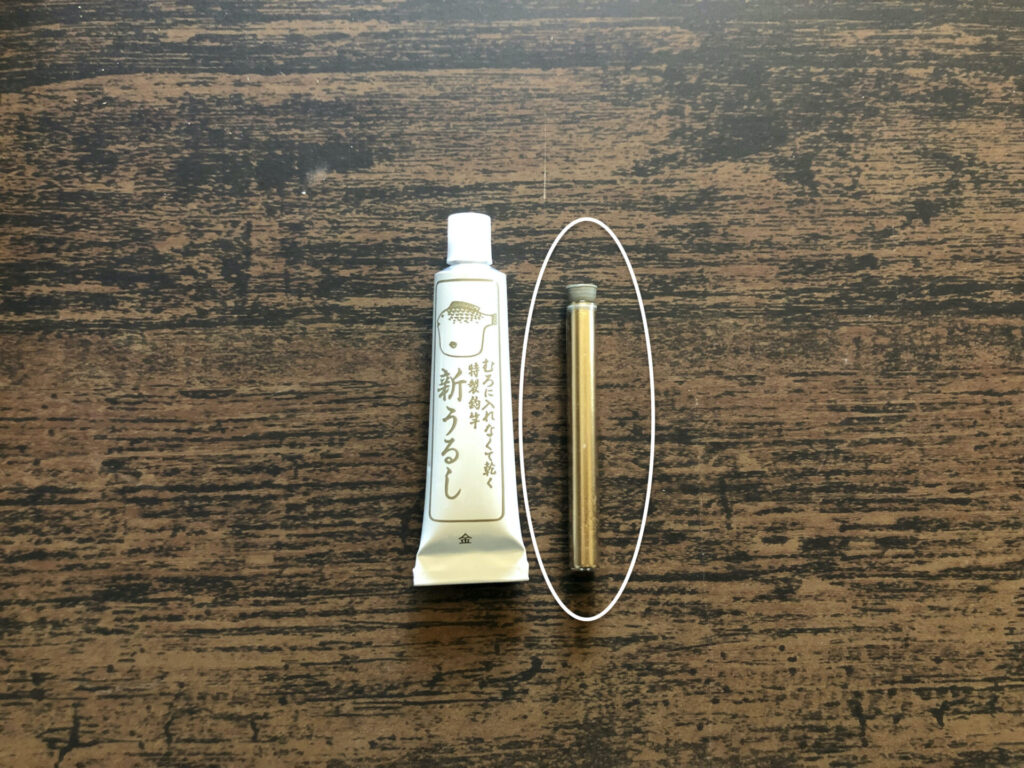
Prepare gold powder substitute for use in modern Kintsugi. While traditional Kintsugi uses real gold powder, its high cost means alternatives like other metal powders or mineral powders can be used instead.
For example, mica powder is easily accessible and, being non-metallic, it’s suitable for those with metal allergies. Unlike traditional Kintsugi-treated items, those repaired with mica powder can be used in microwave ovens.
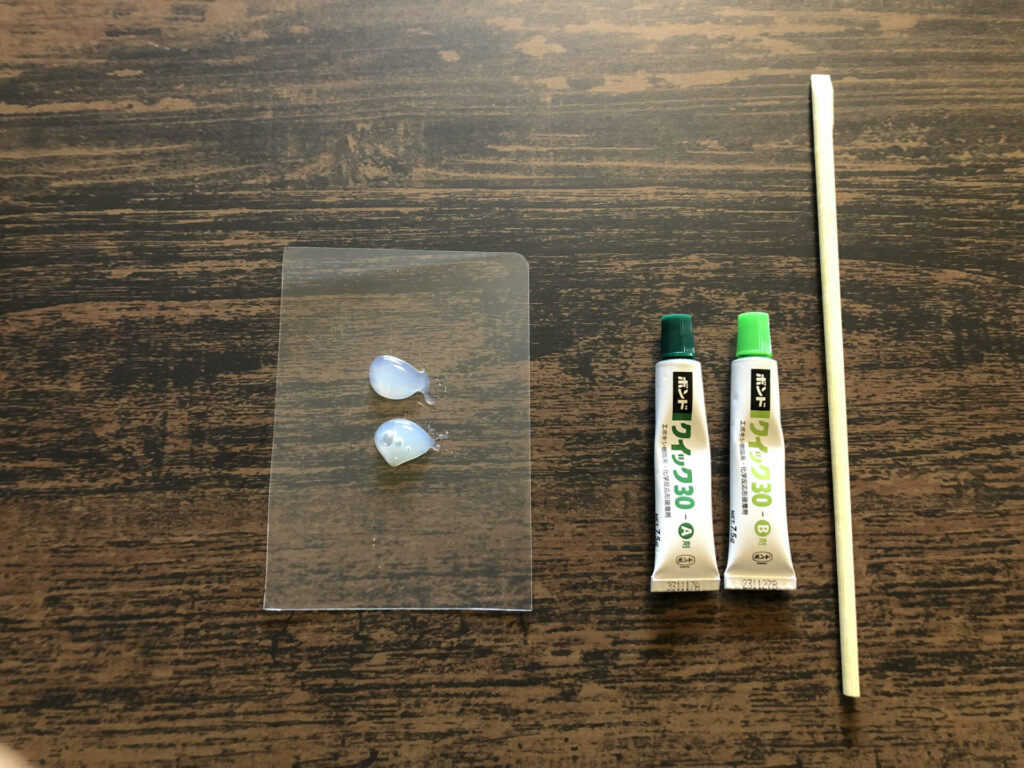
-④Epoxy Adhesive:
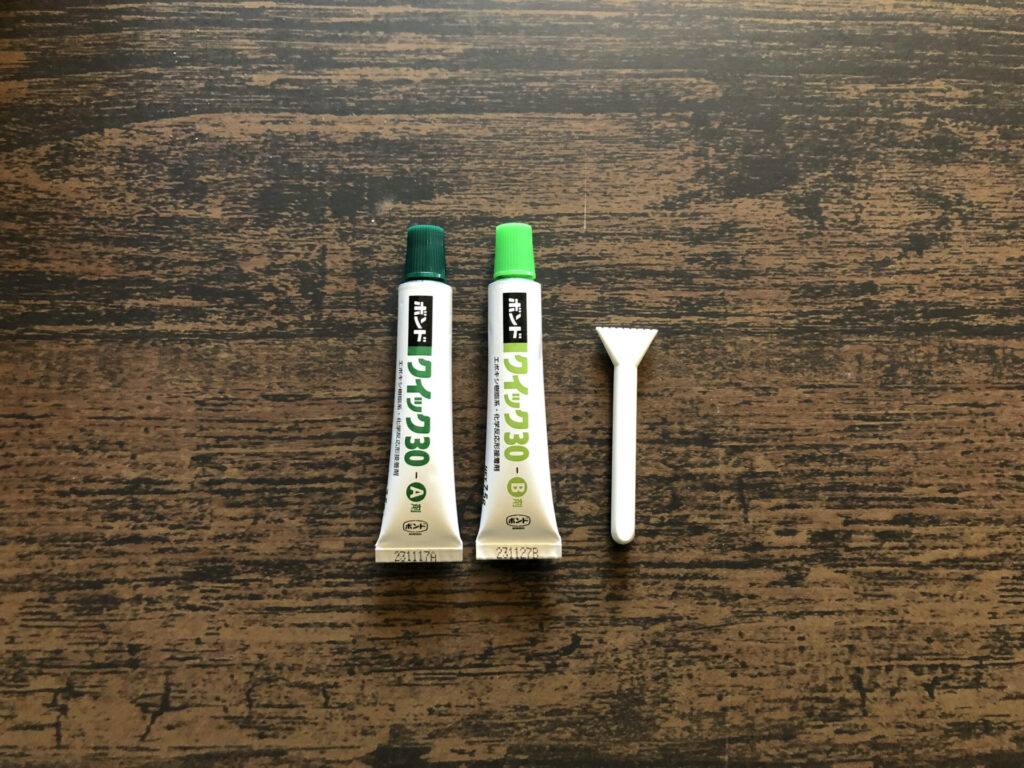
Prepare an adhesive for bonding the broken pieces. The product in the picture is a typical epoxy adhesive, along with a spatula for application.
Pay attention to the curing time when purchasing epoxy adhesive; opting for one that starts to harden in about 30 minutes is advisable, as those that cure faster may harden before the work is done.
-⑤Epoxy Putty:
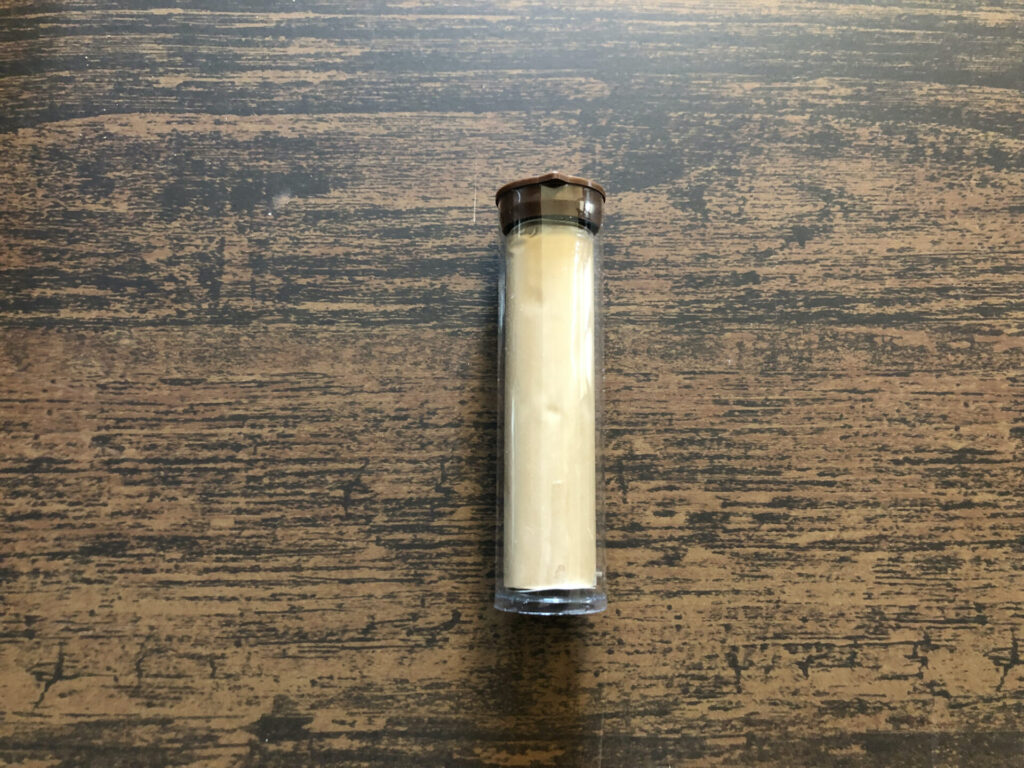
If there are chips in the item or missing fragments, prepare epoxy putty to fill these gaps. The putty shown in the picture is a typical wood filler epoxy putty, but other types can also be used.
-⑥Design Knife/Utility Knife:
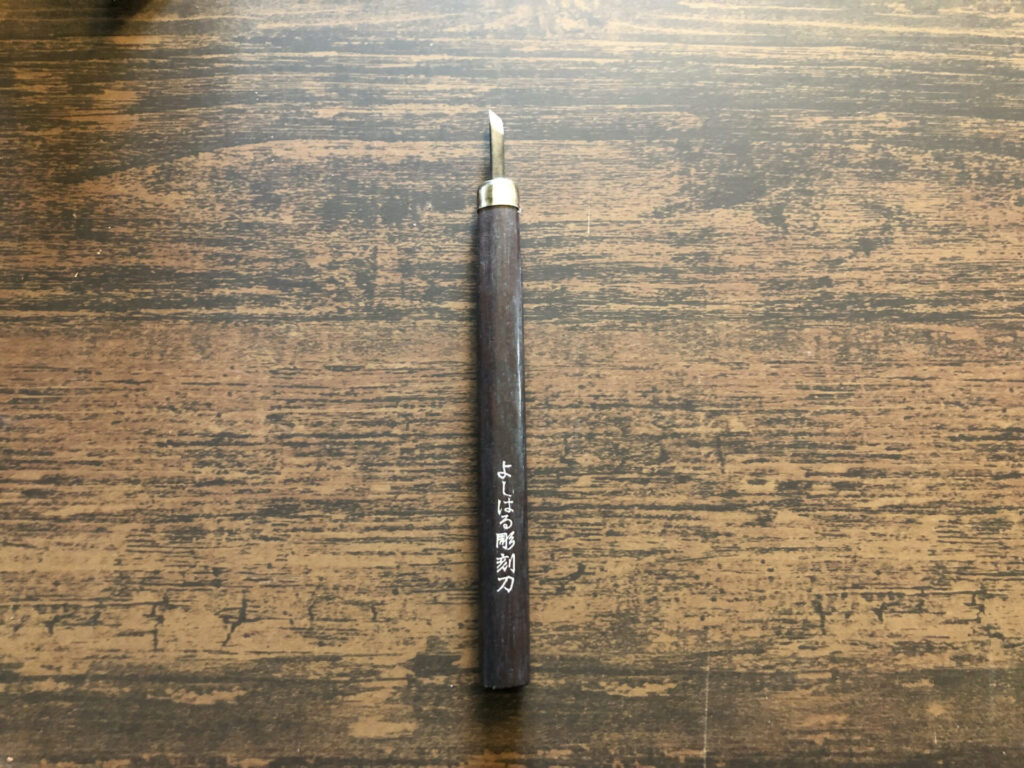
Prepare a design or utility knife. This is used to shave off any excess hardened adhesive after the broken pieces have been glued together.
-⑦Fine Brush:
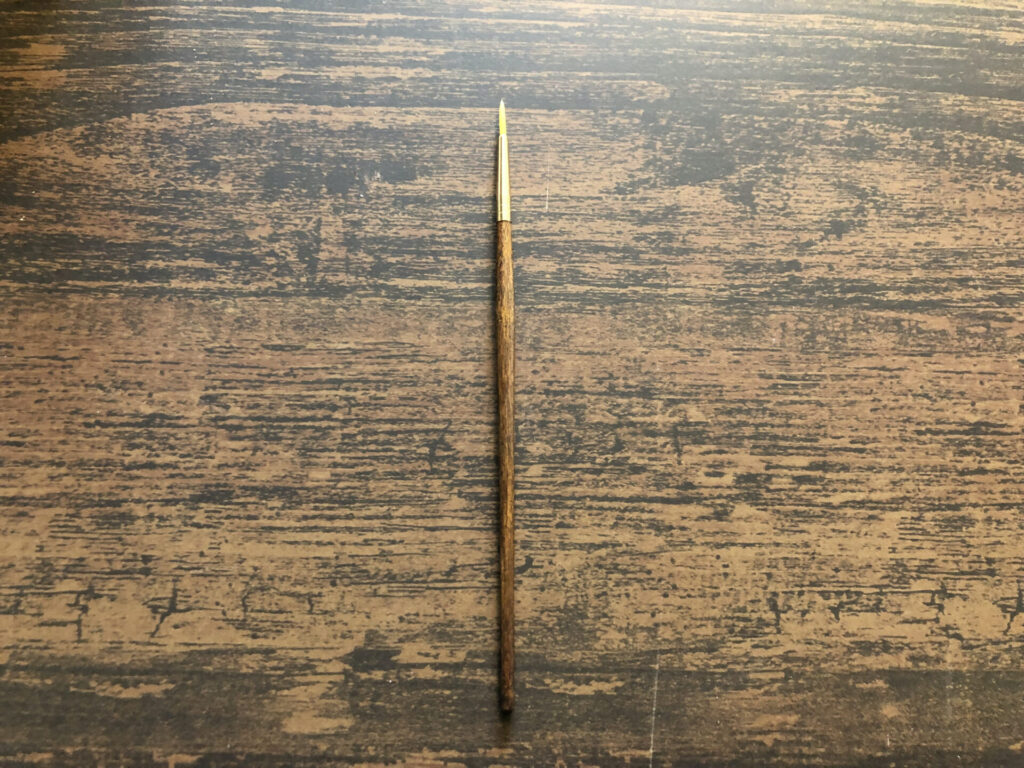
Prepare a fine brush to apply the mixture of synthetic resin and metal powder or substitute mica powder to the broken areas. Since the application process requires precision, choosing as fine a brush as possible is best.
-⑧Small Mixing Board:
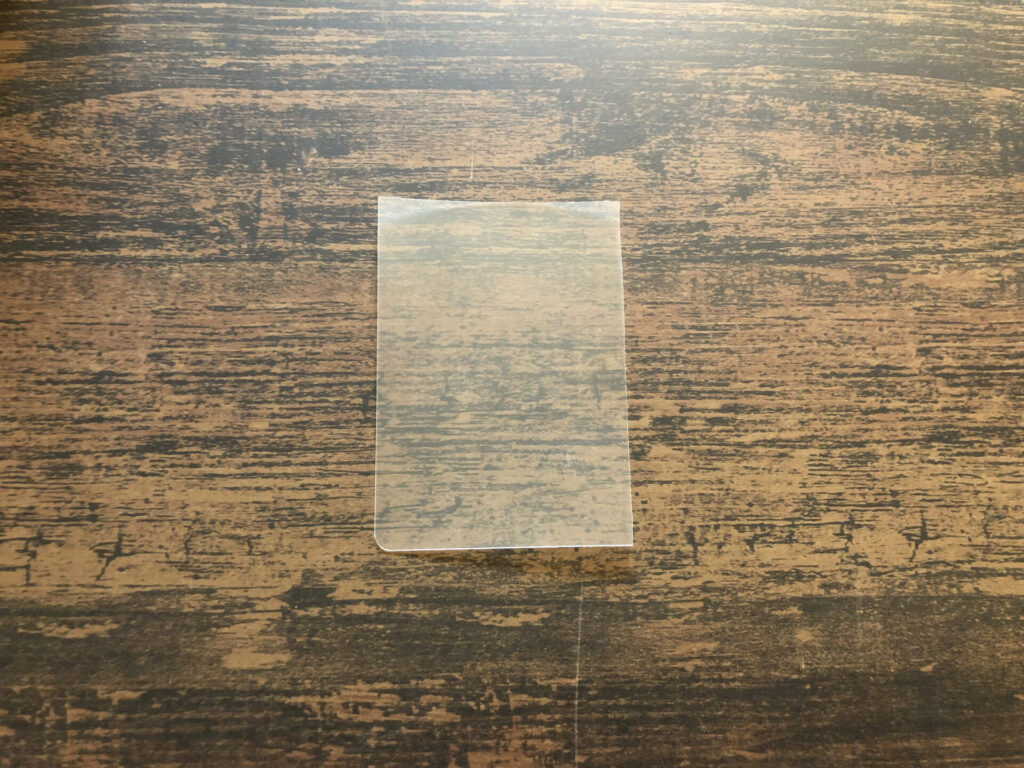
Prepare a small board for mixing the epoxy adhesive. The board shown in the picture is made of plastic, but any material will do.
-⑨Masking Tape:
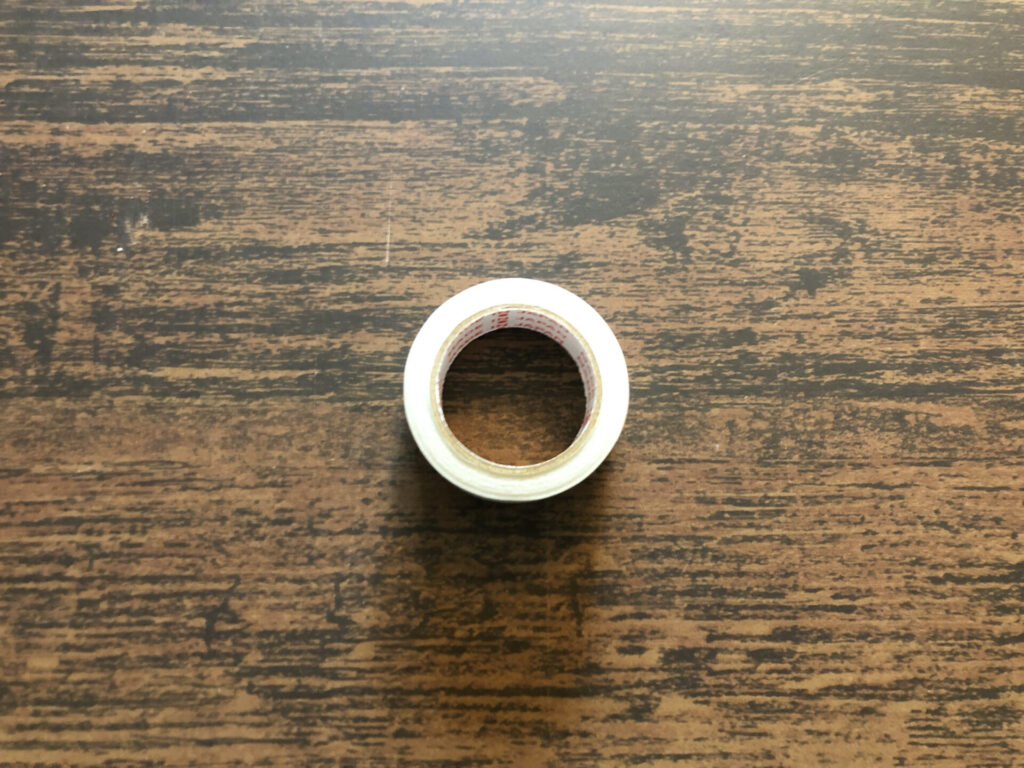
After gluing the broken pieces, you’ll need masking tape to hold the pieces together until they are cured.
-⑩Sandpaper:

Prepare sandpaper to shave off any excess hardened adhesive after gluing or to sand down any filler used in the repair process.
-⑪Small Dish/Palette:

Prepare a small dish or palette for mixing the synthetic resin with gold powder or substitute mica powder.
-(Optional) Gloves:
It is recommended to use rubber gloves while working with epoxy adhesive or epoxy putty.
-(Optional) Turpentine Oil:
After mixing the synthetic resin with gold powder or substitute, the mixture may harden and become difficult to apply. Adding a small amount of turpentine oil can make it smoother and easier to apply.
Step-by-Step Modern Kintsugi Tutorial
1.Gluing the Broken Pieces Together
First, gather all the broken fragments and determine how they fit together, placing each piece near its intended position.
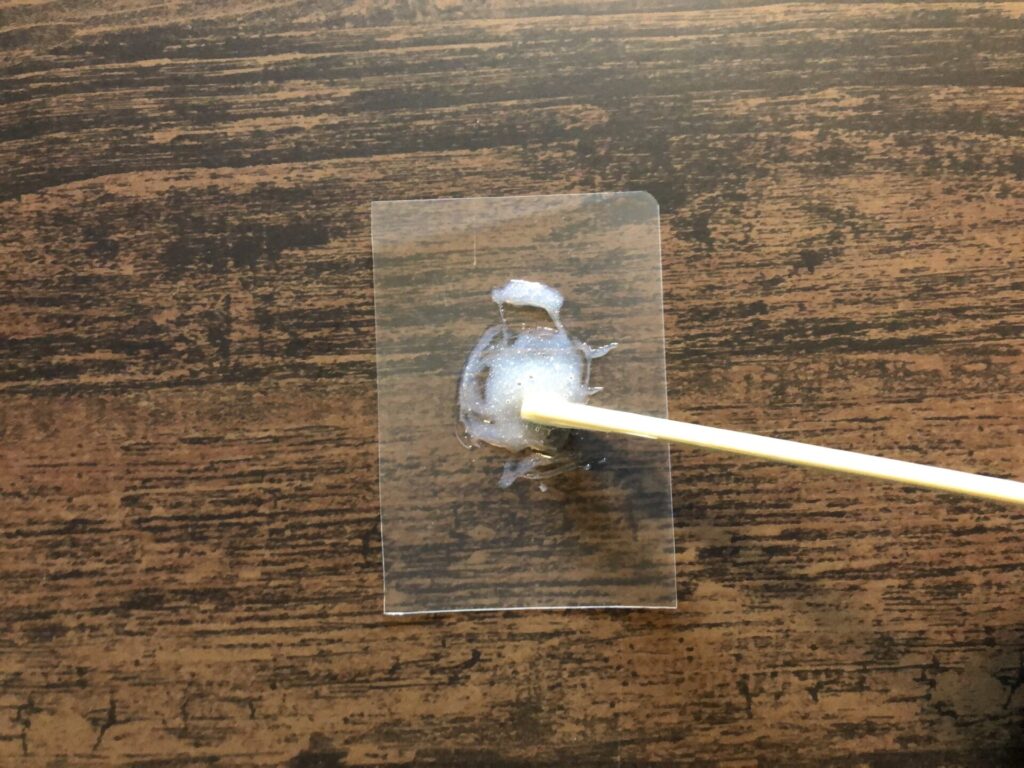
Next, dispense a small amount of epoxy adhesive onto a plastic or similar small board for mixing.
Epoxy adhesive typically comes in two parts, A and B. Thoroughly mix these two components together.
Apply the mixed adhesive carefully to the fracture surface of each fragment.
Attach the pieces one by one, applying adhesive to the fracture surfaces. It’s okay if some adhesive overflows; you can remove the excess later with a utility knife.
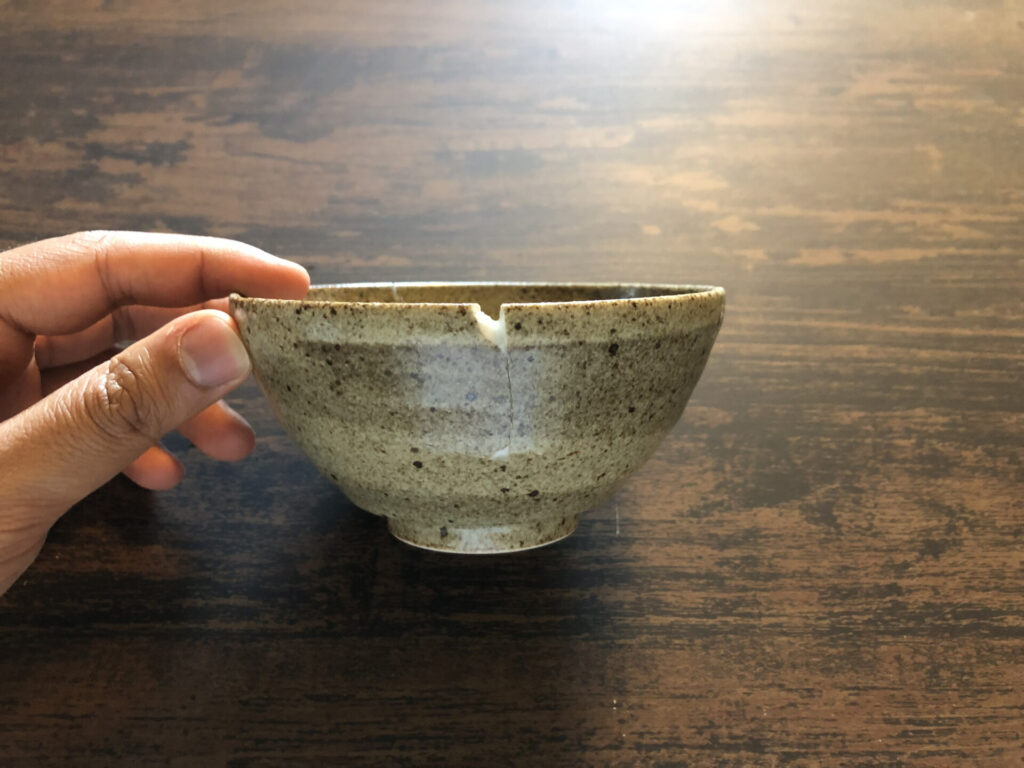
After gluing the broken pieces, use masking tape to hold the pieces together at the break, securing each fragment in place.

Once all the pieces are glued, use masking tape to reinforce the entire item, as shown in the image below. Wait for the adhesive to cure, noting that the curing time varies depending on the adhesive used.

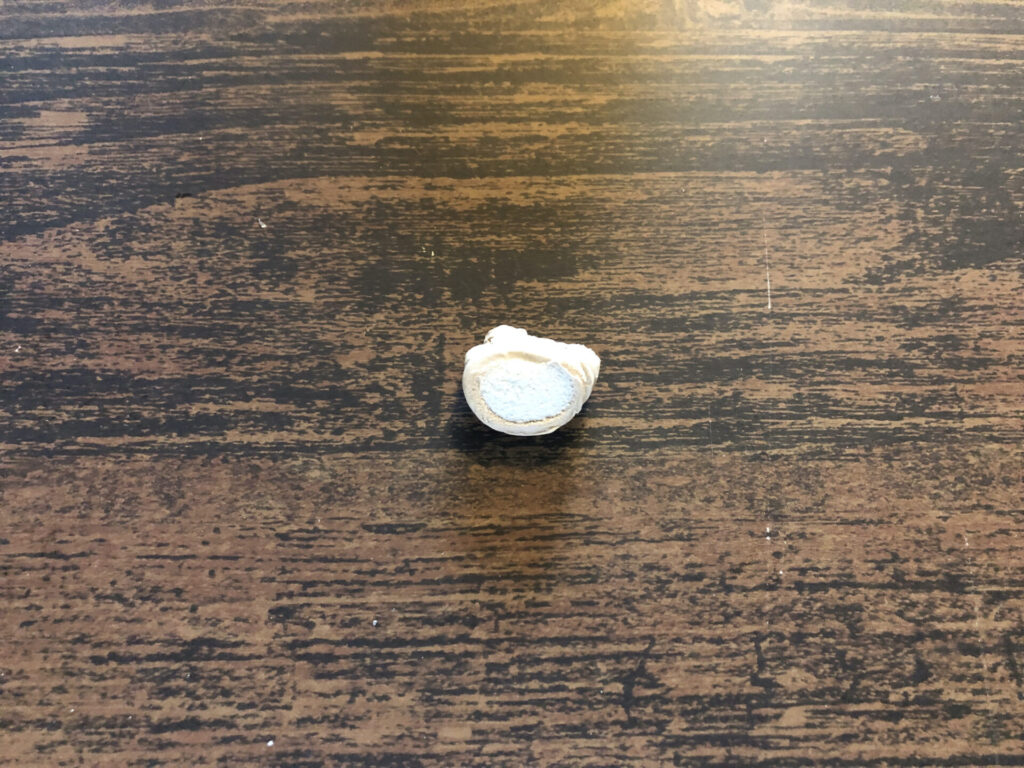
2.Repairing Chips in the Item
Once the adhesive has cured, move on to the next step. If the item has chips like the ones shown in the image below, fill them with epoxy putty.
Take a small amount of epoxy putty.
Mix the epoxy putty thoroughly.
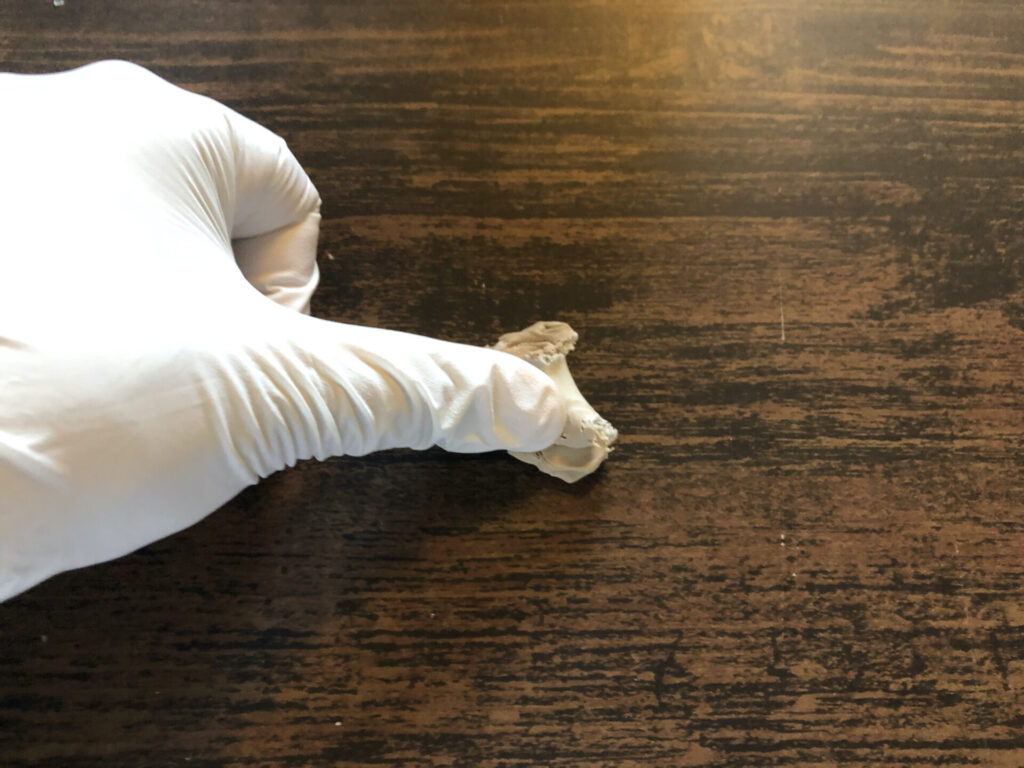
Fill the chipped areas with the epoxy putty. Wearing rubber gloves allows you to safely perform this task with your hands.
Carefully fill the chipped areas and wait for the putty to harden. It’s okay if the putty overflows a bit; you’ll trim the excess in the next step.
After the epoxy putty hardens, use a utility knife to remove any excess.

Smooth the surface with sandpaper after trimming with the knife.
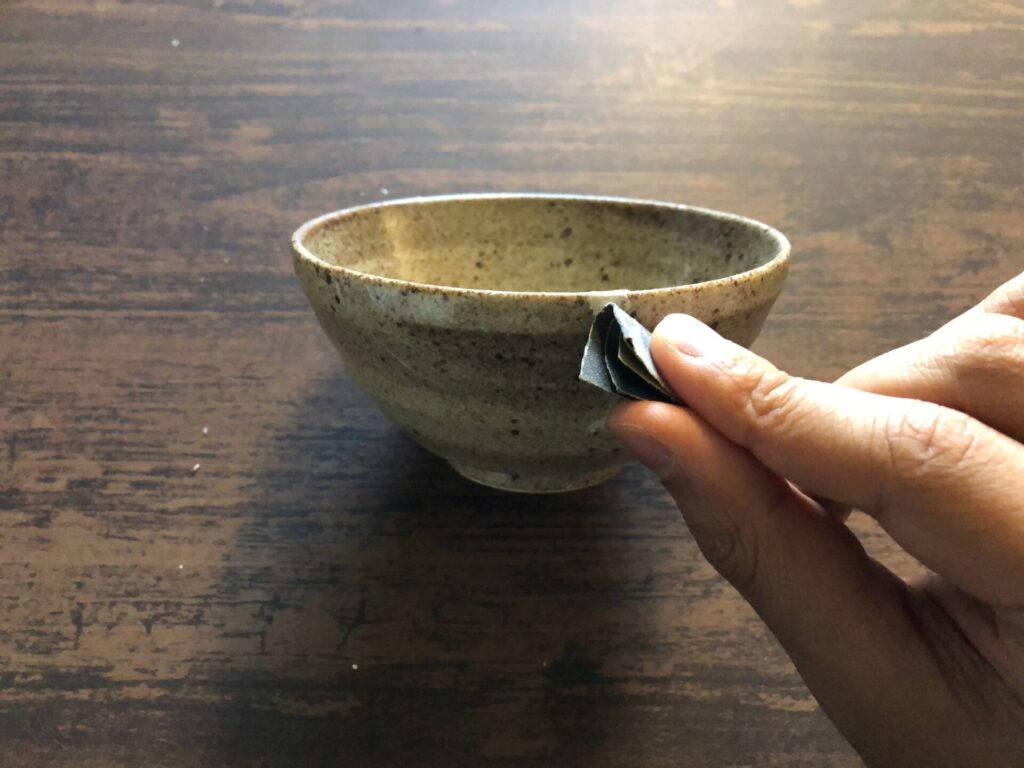
This completes the process of filling and smoothing the chipped areas.
3.Applying the Mixture of Synthetic Resin and Gold Powder
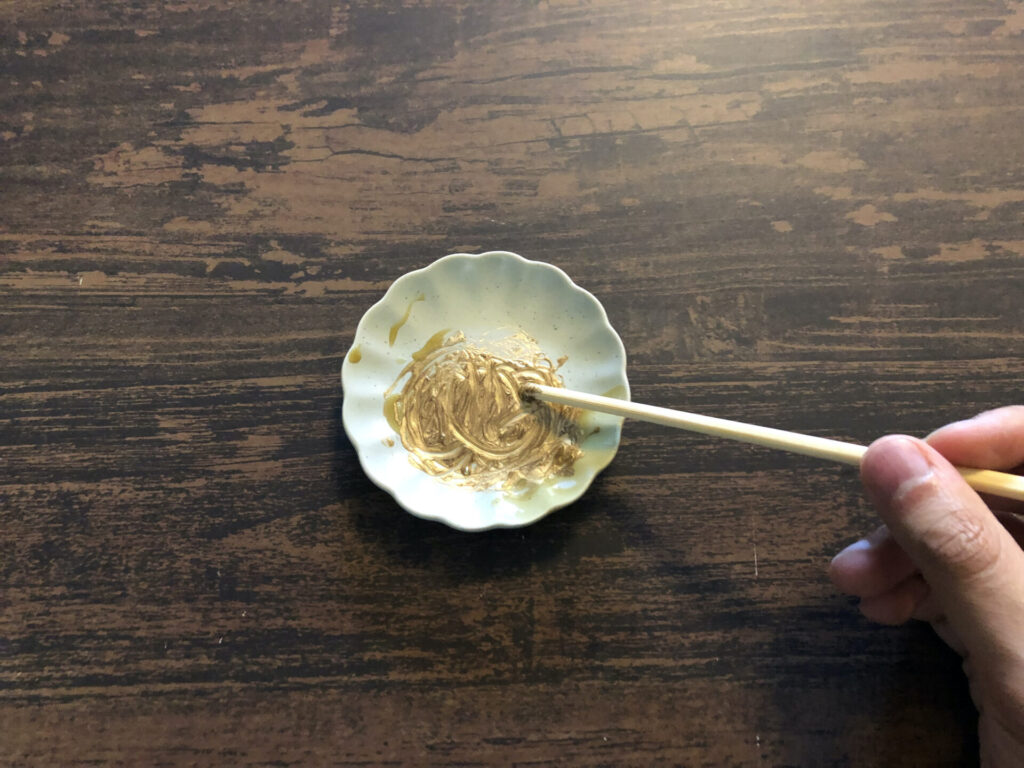
Next, it’s time to make the broken areas gold. First, thoroughly mix the synthetic resin with gold powder or substitute mica powder.
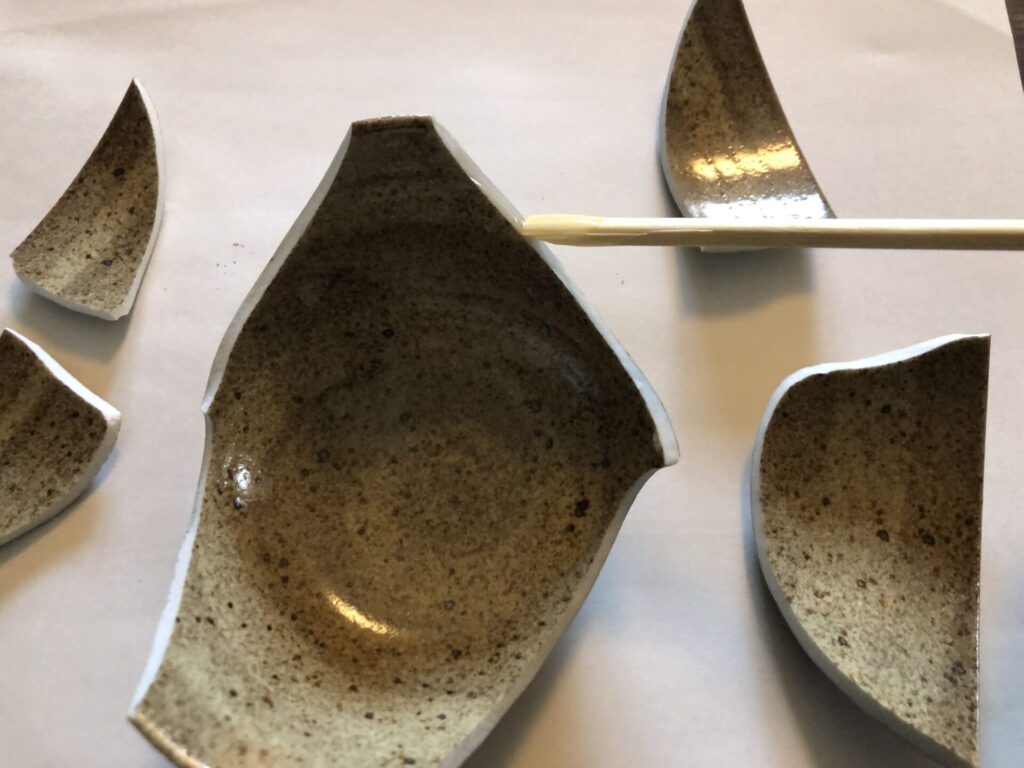
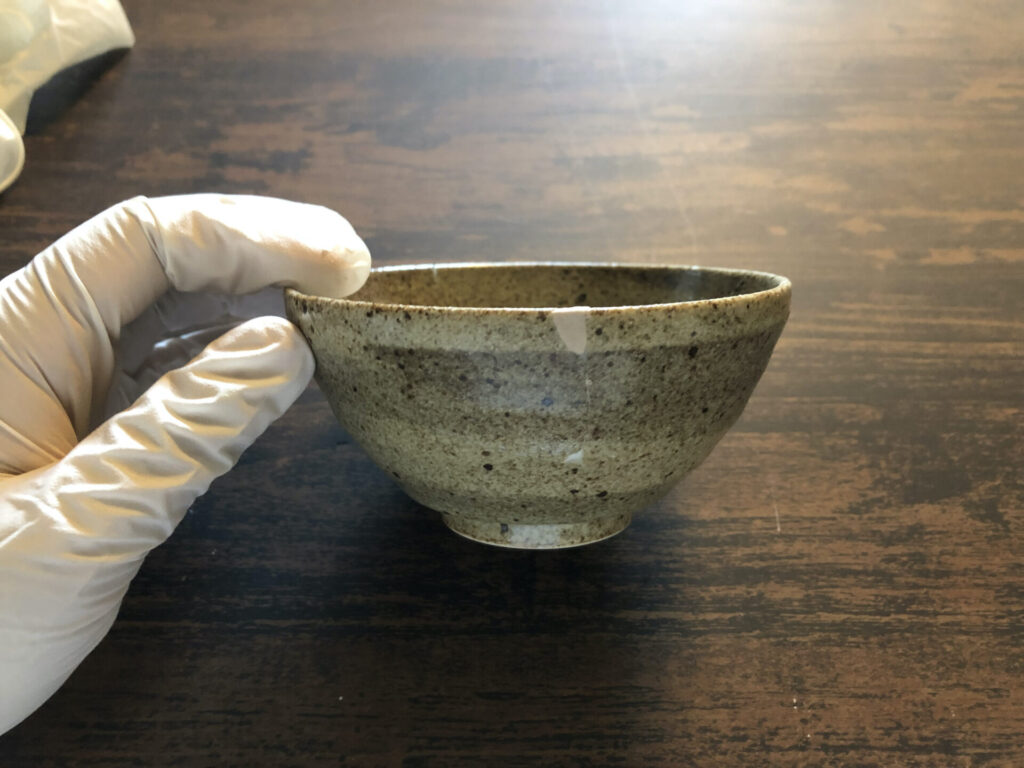
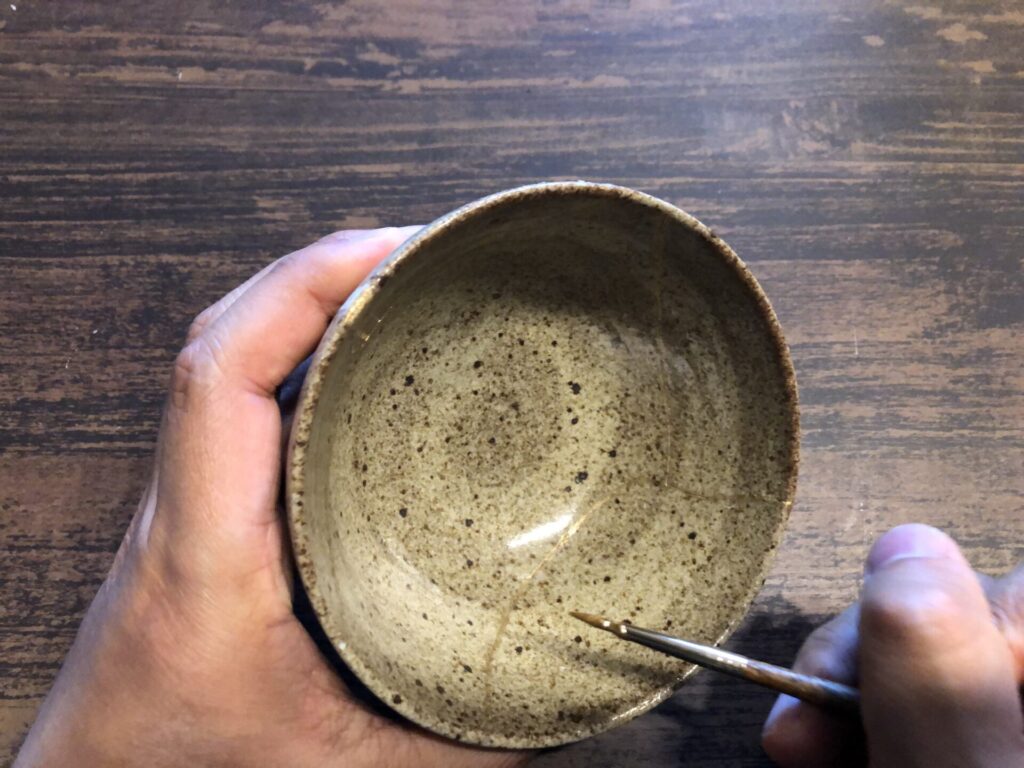
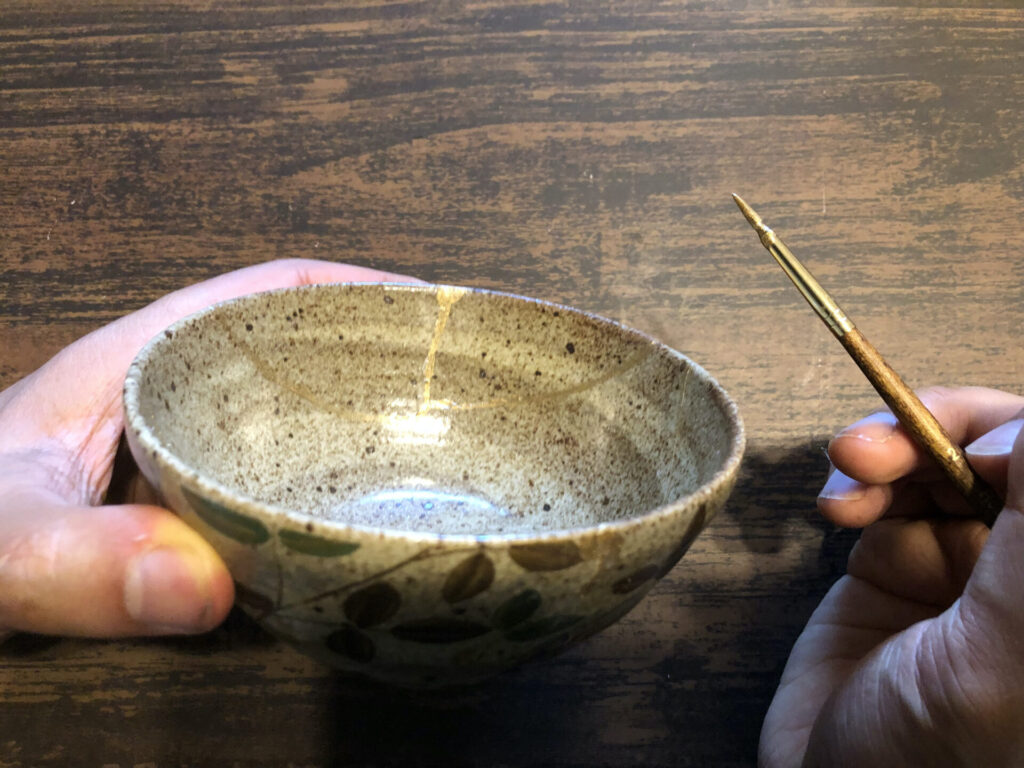
Begin by painting the inside of the item, carefully applying a thin layer along the cracks (the joined parts). This approach is recommended because if you start with the outside, your hand might touch the freshly applied paint when you move on to paint the inside.
If you apply too much of the mixture, you can easily wipe it off by applying turpentine oil or alcohol to the area immediately.
Finally, carefully apply the mixture to the outside broken areas and over any spots repaired with epoxy putty.
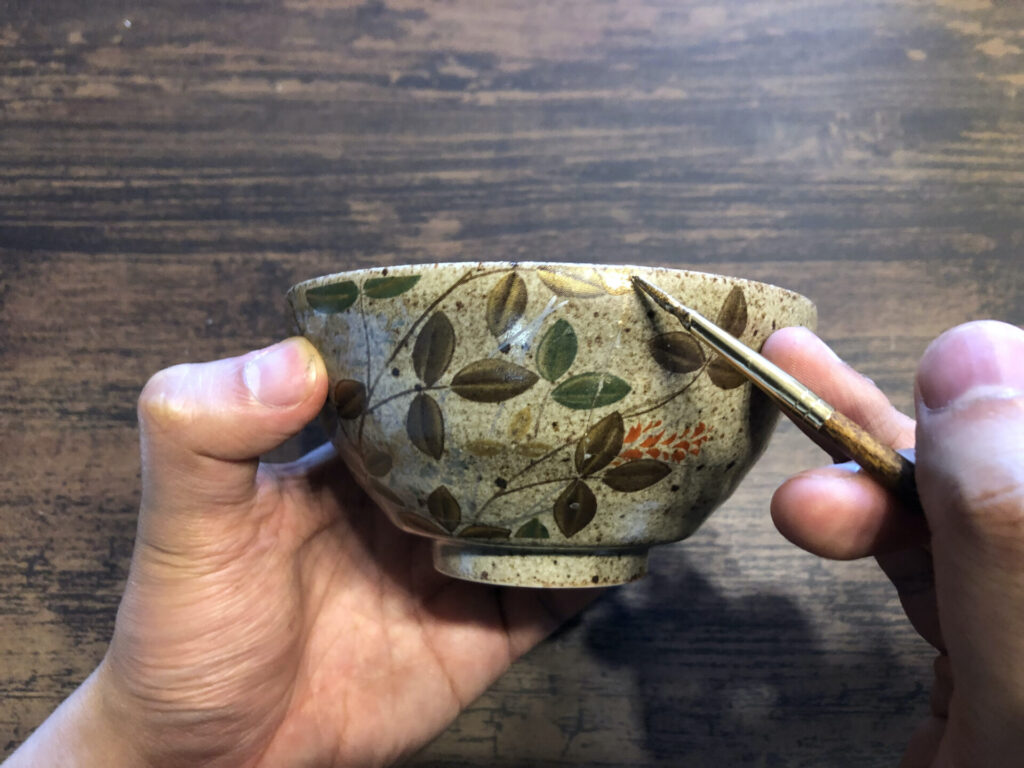
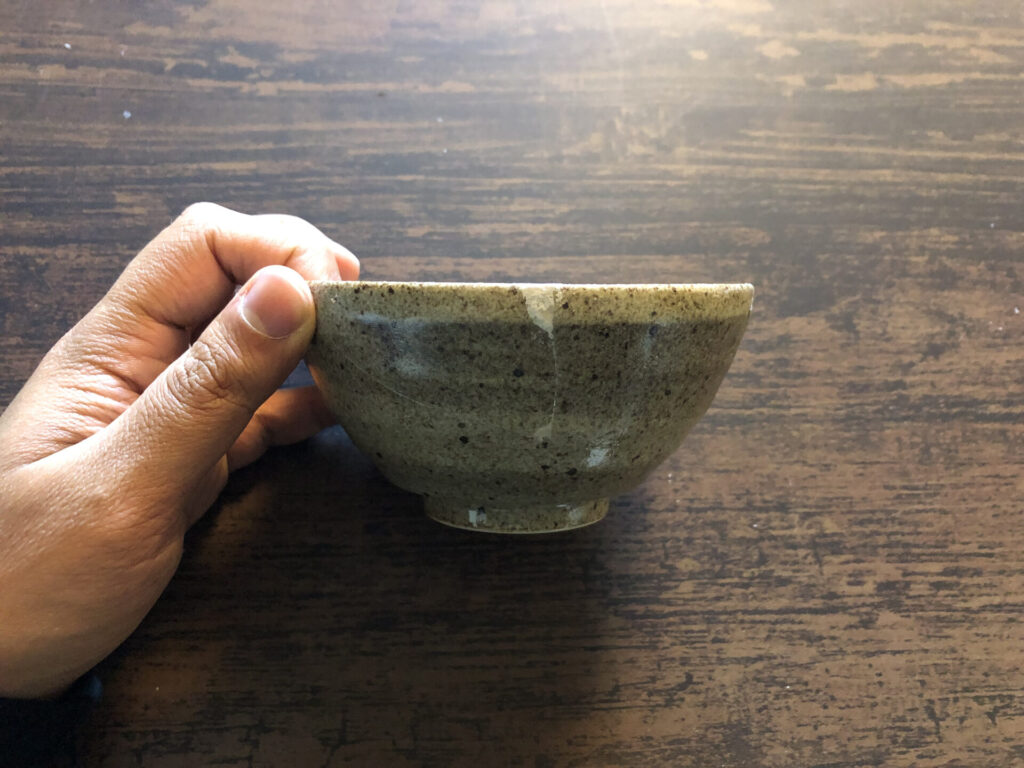
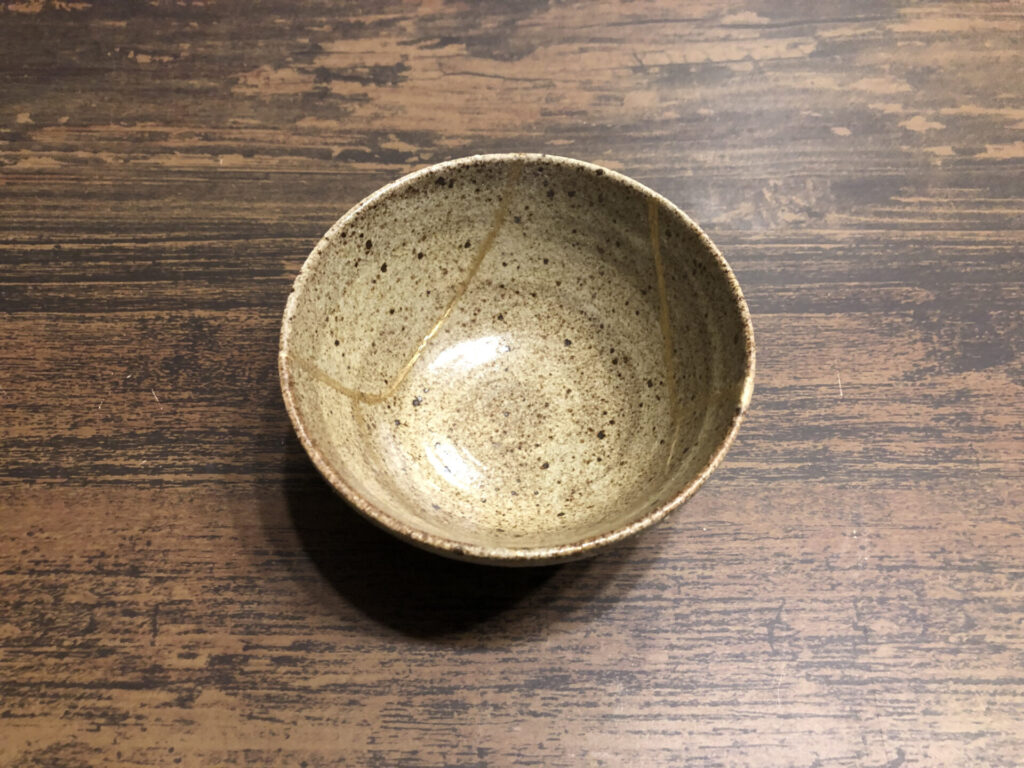
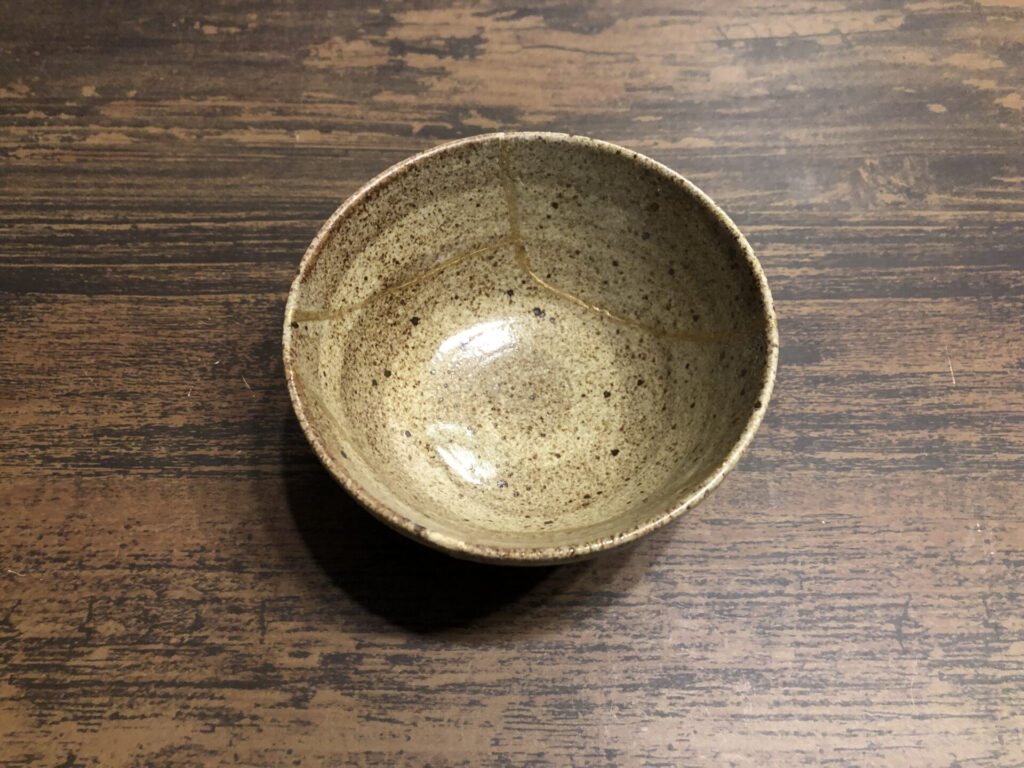
4.Completion
After finishing the painting, wait for the synthetic resin to harden. Once it’s set, your modern Kintsugi process is complete.
FAQ
Q: Are items repaired with modern Kintsugi food safe?
A: The adhesives and synthetic resins commonly used in modern Kintsugi are not food safe. However, there are some adhesives and resins that are food safe. These products can be difficult to find, but using materials that comply with food safety standards allows for the repair of tableware even with modern Kintsugi techniques.
Q: Is practice necessary for modern Kintsugi?
A: Practice is important when doing modern Kintsugi. Although the process is simplified and the materials are easier to handle compared to traditional techniques, practice is necessary to achieve a clean repair.
Q: Which has better durability, modern Kintsugi or traditional Kintsugi?
A: Both modern and traditional Kintsugi offer a certain level of durability. However, it’s advisable to avoid using dishwashers and microwaves with either. Despite the repair, the durability is often less than that of the original item. There’s not much difference in durability between modern and traditional Kintsugi, but in certain conditions, the materials used in modern Kintsugi can offer higher durability.
Q: Which results in a more beautiful finish, modern or traditional Kintsugi?
A: Modern Kintsugi often uses substitutes like brass powder or mica powder instead of real gold powder, which is commonly used in traditional Kintsugi. Therefore, the repaired parts in traditional Kintsugi might appear more lustrous and beautiful due to the use of real gold powder. Additionally, the lacquer used in traditional Kintsugi, which pairs well with gold powder, provides an elegant finish.
Conclusion
Modern Kintsugi offers a simpler twist on the traditional art, making it highly appealing for those looking to try their hand at Kintsugi with materials that are easy to find. This method not only repairs broken items but also enhances their beauty, often surpassing their original appearance. I highly recommend giving this technique a try.
Modern Kintsugi also serves as a perfect gateway to traditional Kintsugi. As you engage in the repair process, you’ll likely find yourself increasingly captivated by its charm.
Beyond just ceramic items, this approach can be applied to ornaments and glassware as well. I encourage you to create your own unique piece of art, a one-of-a-kind masterpiece in the world, with your own hands!